


Table of Contents
- Why Most Pool Inflatables Fail Within One Season
- Durable Pool Float Materials: What to Look For
- Seam Construction and Puncture Resistance: The Hidden Weak Points
- Best Alternatives to Traditional Pool Noodles
- How to Repair Inflatable Pool Toys Before You Throw Them Away
- How to Spot High Quality Pool Inflatables in 6 Steps
- Storage and Off-Season Care: Making Inflatables Last for Years
- Conclusion
- Frequently Asked Questions
Last Updated: September 11, 2026
Why Most Pool Inflatables Fail Within One Season
Most pool inflatables fail because the material is too thin, the seams are heat-sealed rather than welded, and UV breaks down the plastic within months (PubMed). Spotting high quality pool inflatables before you buy is the difference between one summer of fun and five.
Finland's short, intense pool season compresses the stress test: midsummer UV, chlorinated water, and repeated inflation cycles expose weaknesses fast. A float that survives a local summer is genuinely well made.
Durable Pool Float Materials: What to Look For
Durable pool float materials are thick vinyl, thermoplastic polyurethane, or laminated PVC with a UV-resistant coating. The best quality indicator is vinyl thickness: look for material gauge in millimetres, not vague "heavy duty" claims. Manufacturers often test to standards like EN 71-1 for mechanical and physical properties of toys, which includes material strength.
What you're choosing between:
- Standard PVC vinyl (0.20-0.25 mm): Cheap, common, and the reason most floats fail. Tears easily and degrades under UV.
- Thick vinyl (0.30-0.45 mm): The practical sweet spot for family use. Handles rough play and holds buoyancy longer.
- Thermoplastic polyurethane (TPU): Lighter, more puncture-resistant, and often phthalate-free. Costs more but resists chlorine degradation better than standard vinyl.
- Foam-core floats: Not inflatable, so no punctures, but foam density determines whether they stay buoyant or waterlog within a season.
Don't judge quality by how the float looks inflated in photos. Squeeze the material: if it feels like a plastic bag, it won't survive a summer; if it resists and springs back, it has real gauge behind it.
Thickness, Weight, and Buoyancy: The Numbers That Matter
Buoyancy comes down to displaced volume, not thickness, but thickness determines how long that buoyancy lasts. A float rated for 100 kg needs enough chamber volume to support it and enough gauge to hold air under pressure.
Weight capacity and dimensions on the label tell you more than any marketing claim. A float listing a specific weight capacity was tested; one that says "for adults" was not.
Seam Construction and Puncture Resistance: The Hidden Weak Points
Seam integrity is where most inflatables die. Look for reinforced seams that are seam-welded or heat-sealed with a visible overlap, not glued edges. Run your thumb along the seam: welded feels smooth and continuous; a weak one has ridges, gaps, or a glued line lifting.
Puncture resistance works the same way. Thicker material helps, but a multi-chamber design matters more: if one chamber fails, the float doesn't deflate entirely, keeping kids safe and giving you time to patch it.
Best Alternatives to Traditional Pool Noodles
The best alternatives to traditional pool noodles are foam-core floats, TPU loungers, and multi-chamber inflatable game sets, all of which outlast a standard noodle by several seasons. Noodles are cheap for a reason: low-density foam that waterlogs, cracks under UV, and sheds into the water.
Better options, ranked by longevity:
- Closed-cell foam floats: Higher foam density resists waterlogging. Look for a smooth, non-porous surface texture.
- TPU inflatable loungers: Puncture-resistant, repairable, and lighter to store than foam.
- Multi-chamber game sets: Basketball hoops, floating tables, and ring-toss games built with welded seams give you years of use instead of weeks.
For families, the practical upgrade is a game set rather than a single noodle: it holds attention longer and, if well made, survives the season.
How to Repair Inflatable Pool Toys Before You Throw Them Away
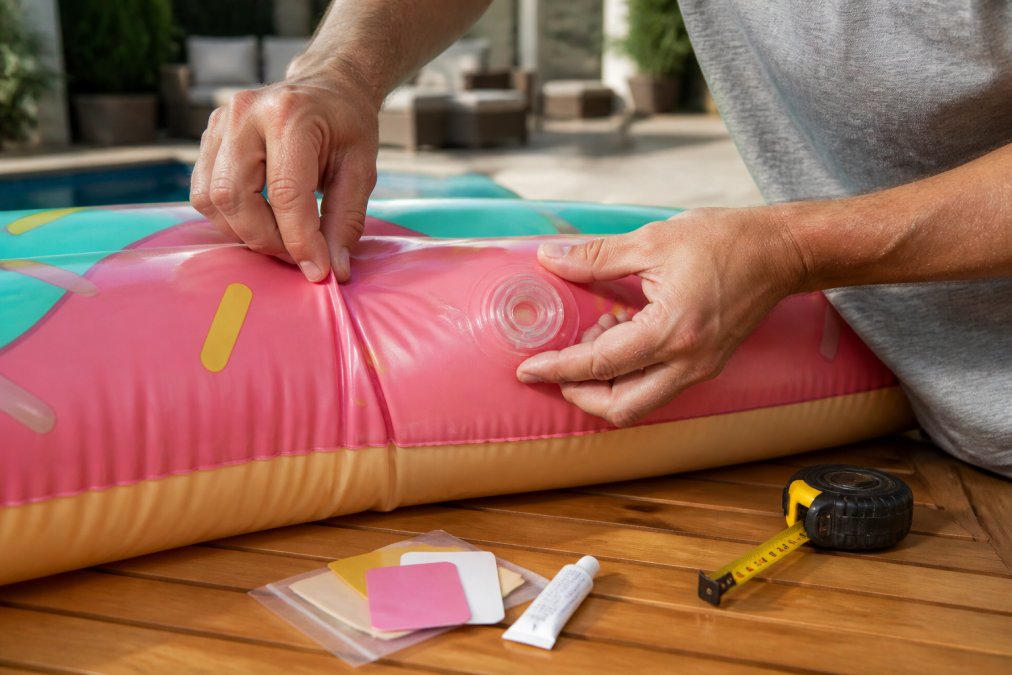
Learning how to repair inflatable pool toys saves money and keeps usable products out of waste. Most leaks are patchable in under 20 minutes, but the outcome depends less on technique than on whether the included repair kit is worth using.
How to Judge the Repair Kit Before You Need It
A patch kit is the most underrated accessory that ships with a float, and most are close to useless. Evaluate it like the float:
- Patch material must match the shell. A PVC float needs PVC patches; a TPU lounger needs TPU patches. A generic "vinyl" patch on a TPU shell will lift at the edges within days because the two materials flex differently.
- Patch thickness should be close to the shell gauge. A 0.30 mm shell paired with a paper-thin patch creates a stiff spot that peels. A patch noticeably thicker than the shell is just as bad, it will not conform to curves.
- Adhesive type matters more than patch size. Look for a kit that names its adhesive (a vinyl cement or a TPU-compatible glue) rather than a peel-and-stick sticker. Peel-and-stick patches are fine for a beach-day emergency, not a permanent fix.
- Check the kit's age. Adhesive tubes and self-adhesive patches have a shelf life, often around two years. A kit sitting in a warehouse or hot garage may already be compromised before you open it.
- Count the patches. A kit with one patch is a token gesture. Two or three patches in mixed sizes signals a manufacturer that expected the product to be repaired, not replaced.
If the included kit fails these checks, buy a proper vinyl or TPU repair kit separately, it costs little and is the difference between one season and five.
Finding the Leak Properly
A leak you cannot see is usually a seam or valve, not a puncture. Work through it in order:
- Inflate fully, then listen. A large leak hisses. Small ones do not.
- Wipe with soapy water. Bubbles mark the puncture. Pay particular attention to seams, valve bases, and where the shell meets any welded accessory.
- Submerge if needed. In a bathtub or large bucket, a slow stream of bubbles pinpoints a leak that soapy water misses.
- Suspect the valve first. A valve leaking at the base is far more common than a mid-panel puncture, and it is repaired differently, usually by reseating or replacing the valve, not by patching.
A Repair That Actually Holds
- Deflate and clean. Patches won't bond to a damp, chlorinated, or sunscreen-coated surface. Rinse with fresh water and dry completely.
- Roughen lightly if the kit allows. A light scuff on glossy PVC gives adhesive grip. Don't sand through the material.
- Apply adhesive to both surfaces where specified. Many vinyl cements need a short tack time, read the instructions rather than pressing immediately.
- Size the patch generously. At least 1 cm of overlap on every side, and round the corners. Square corners lift.
- Roll, don't just press. Roll firmly from the centre outward to push trapped air out, trapped air is the most common reason a patch fails.
- Cure fully before inflating. Usually several hours, not minutes. Inflating early stretches the bond before it sets.
- Test overnight. Re-inflate and leave it. A patch that holds 24 hours usually holds the season.
When to Repair and When to Retire
Repair is worth it when the shell is sound and the failure is local, a puncture, a single seam, a valve. Retire the float when the material has gone brittle, the same seam keeps failing after two repairs, or the shell has a network of fine cracks. Those mean the plastic has degraded past patching.
A well-chosen repair kit extends a good float's life by years and rescues a cheap one long enough to finish the summer. Judging the kit before you need it decides which outcome you get.
How to Spot High Quality Pool Inflatables in 6 Steps
You can identify high quality pool inflatables in under two minutes by checking six things in order: material gauge, seam type, valve design, chamber count, UV rating, and safety labelling. Skip the photos and marketing copy, the specifications tell the truth.
Step-by-Step Quality Checklist
Use this checklist before buying any inflatable:
- Material gauge listed in millimetres (0.30 mm or thicker for family use)
- Seams are welded or heat-sealed, not glued
- Wide-mouth inflation valve with a double seal
- Multi-chamber design for anything used by children
- UV-resistant and phthalate-free materials stated on the label
- Specific weight capacity and dimensions given in metric
If a product fails three or more of these, walk away. If it passes five or six, you're looking at something built to last.
Storage and Off-Season Care: Making Inflatables Last for Years
Off-season care separates a float that lasts one summer from one that lasts five. UV and chlorine do most of their damage during the season, but poor storage finishes the job.
What Goes Wrong in Storage
Three failures account for most off-season damage:
- Mould and mildew. Moisture left inside chambers or trapped in a folded seam becomes a growth site. Mould stains vinyl permanently and degrades the material it grows on.
- Plasticiser migration and brittleness. Vinyl stays flexible thanks to plasticisers. Heat and UV drive them out, leaving material stiff and prone to cracking at folds, a float stored in a hot shed through a cold winter can come out brittle even if unused.
- Crease fatigue. Every sharp fold is a stress line. Fold the same float the same way each year and it will eventually crack along those lines, usually where a seam already carries load.
Preparing a Float for Storage
- Rinse in fresh water. Remove chlorine, salt, and sunscreen residue, chlorine keeps working on the material long after the pool is closed.
- Clean gently if needed. Mild soap and a soft cloth. Avoid solvents, alcohol, and abrasives, they strip plasticisers.
- Dry completely, inside and out. Inflate lightly, wipe the exterior, then leave the valve open in a shaded, ventilated spot until the interior is genuinely dry. A float that feels dry outside can still hold moisture in the seams.
- Deflate fully. A partially inflated float stored under pressure creases unpredictably and stresses seams.
- Fold loosely. Wide, soft folds rather than tight, sharp ones, and fold along different lines each year so the same creases aren't stressed repeatedly.
- Store flat or loosely rolled. Never press a folded float under heavy objects or hang it by a single point, the material will stretch and distort.
Where to Store It
A dry, dark, cool cupboard is ideal. Three conditions matter most:
- Dark. UV keeps damaging vinyl even off the pool. A sunny shelf is slow degradation.
- Cool and stable. Avoid attics, unheated garages, and anywhere swinging between hot and freezing, temperature cycling drives plasticiser loss and brittleness.
- Dry and ventilated. A sealed plastic bag traps residual moisture and encourages mould. A breathable cotton bag or loose cardboard box is better.
A Quick Off-Season Routine
- Rinse and dry thoroughly at the end of the season, not the start of the next.
- Inspect seams and valves while the float is inflated for the last time, small issues are easier to fix now than in spring.
- Patch anything you find before storing, so the repair has months to cure.
- Store deflated, loosely folded, dark, cool, and dry.
- Check once mid-winter; if there's any moisture or mould, air it out and re-store.
Bringing It Back Out
Before the first swim, inflate the float and leave it a few hours. Check the seams, valve base, and any tightly folded spot. A float that held air all winter is ready; one losing pressure slowly has a leak you can find with soapy water before it ruins a pool day.
Conclusion
The pool inflatables that fail are the ones nobody inspected before buying, and the fix costs two minutes at the shelf. Check the material gauge, seams, valve, chamber count, and UV rating, and you'll never be surprised by a mid-summer leak again.
RippleWave carries durable, family-friendly inflatable pool toys and interactive water games, backed by fast delivery with tracking, no EU import duties, and fully recyclable and biodegradable signature shipping boxes. Get started with RippleWave and turn an ordinary pool day into one your family remembers.
Frequently Asked Questions
How can you tell if a pool float is durable?
Check the material gauge and seam construction first. A durable pool float typically uses PVC that is at least 0.25 mm thick, or thermoplastic polyurethane (TPU) for lighter weight and higher tear strength. Look for reinforced seams that are welded rather than glued, and a valve with a double seal. Foam floats should have high foam density and a waterproof coating. These features resist hydrostatic pressure and chlorine degradation far better than thin, single-layer inflatables.
What is the best material for pool inflatables?
Thermoplastic polyurethane (TPU) and thick PVC are the two most common durable pool float materials. TPU is lighter, more puncture resistant, and often phthalate-free, making it a strong choice for families with young children. PVC is heavier and can be more affordable, but quality varies widely. Look for UV-resistant and chlorine-resistant additives. Avoid inflatables with a strong chemical smell, which can indicate lower-grade plasticisers and poor material quality.
How long should high-quality pool inflatables last?
With proper care, a high-quality inflatable can last three to five seasons. The biggest factors are UV exposure, chlorine degradation, and storage. Rinse with fresh water after each use, dry fully before folding, and store out of direct sunlight. Foam floats with high foam density and a waterproof coating often outlast inflatables because they have no seams or valves to fail. Patch kits can extend life by one or two seasons if damage is caught early.
Are there specific safety standards for pool inflatables?
In the EU and Finland, pool inflatables sold as toys must comply with the Toy Safety Directive (2009/48/EC) and carry the CE mark. This covers phthalate limits, flammability, and mechanical safety. Inflatables designed as buoyancy aids are covered by different standards and must not be treated as life-saving devices. Always check for the CE mark and age warnings. For children under three, avoid small detachable parts that could pose a choking hazard.


